


Prerequisites
This blog post assumes that we've already set up a connection to a space within your Data Warehouse Cloud system. For a step-by-step guide on creating the connection you can reference this blog post
Furthermore we're going to need a table within the DWC Database User schema with a primary key defined. We're going to walk this through below
Upserting
If the target database table has a primary key assigned, we can use UPSERTING to give us the behaviour we expect from the changed file. If an entry in our file has an entry with a matching primary key in the table, it will perform an UPDATE - if there's no matching entry in the table it will INSERT the row instead.
For clarity, it's important to note that any rows completely removed from the source file will not be removed from the target table.
Table Preparation
For our initial data load, we're going to use a very simple schema. Copy the below contents and save it in a file called Employee.csv
1001, Adam Evans, 53

1002, Rose Hoskins, 32

1003, Fred Davis, 48
Within our Data Warehouse Cloud space, we want to navigate to the Database Access section. Here we find the Database User that was specified in our Data Intelligence Connection. Select this user on the left then click on Open Database Explorer
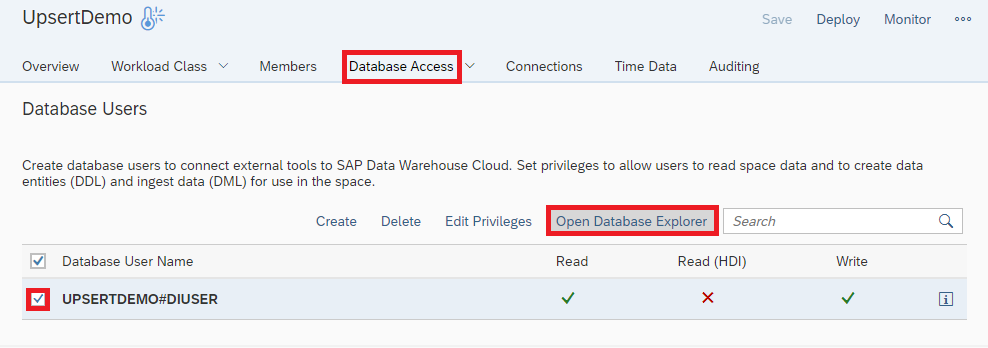
Select the Database User then click on Open Database Explorer
Once we reach the Database Explorer, we see a Database Connection Properties popup box. Here we want to enter the password for our Database User, and optionally save these credentials in the SAP HANA secure store before we click OK.
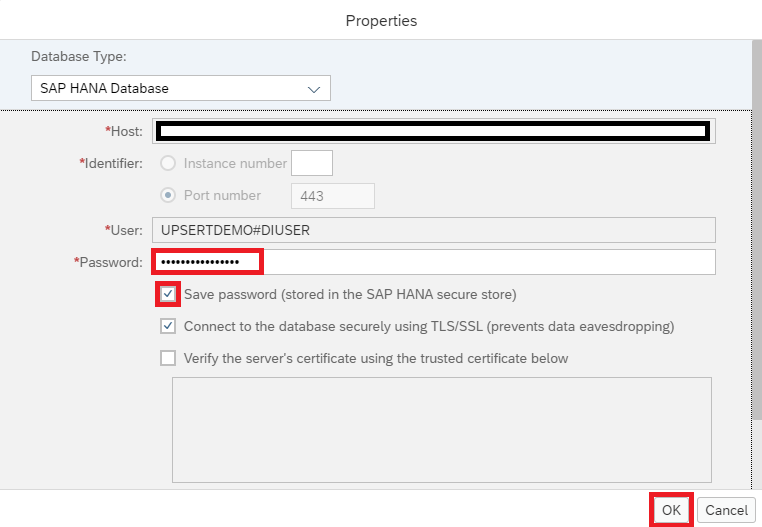
Saving Database Explorer credentials
For the purposes of this blog post we're going to directly create the table using the SQL Console. In a productive scenario you would probably want to define this table in a way that can be replicated and version controlled (perhaps using .hdbmigrationtable)
To open the SQL Console, we right click on the connection we just created, and then select Open SQL Console
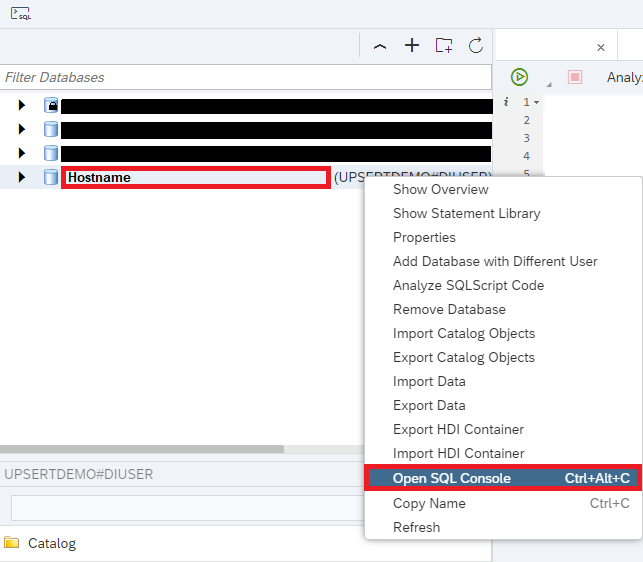
Opening the SQL Console
We want to use the below SQL Syntax inside the SQL Console to create our target table, specifying the Employee ID (empID) as the Primary Key
CREATE TABLE EMPLOYEE(

	empID varchar(255) NOT NULL PRIMARY KEY,

	empName varchar(255) NOT NULL,

	empAge int NOT NULL

);
Once the command has been copied into our console, we run it to create our target table

Run our SQL Command to create our target table
Once our table has been successfully created, we'll see a message with some execution statistics. Additionally, if we want to verify it for ourselves we'll find the table in the catalog on the left
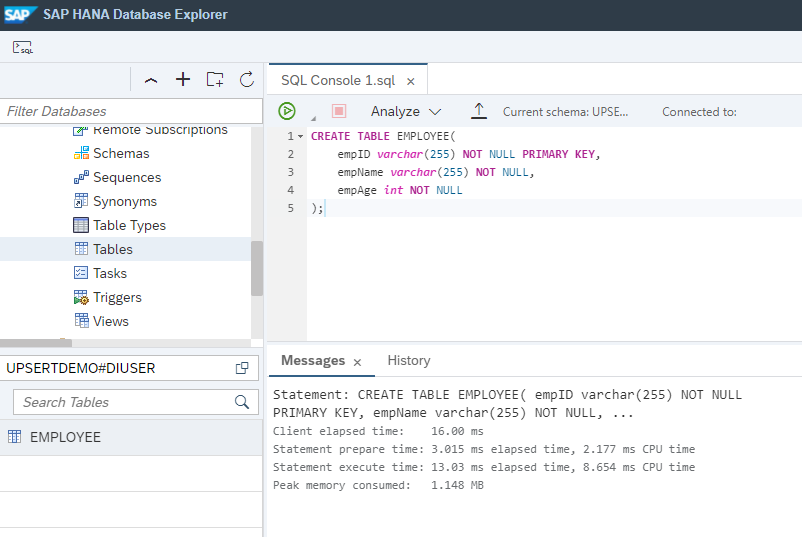
Our table has been created successfully
Creating Our Pipeline
First things first, we'll want to upload our Employee.csv file to one of our Data Intelligence Connections using the Metadata Explorer. For this blog post we're using a folder within DI_DATA_LAKE, but this choice is arbitrary

Click on the Upload icon
Within the Upload screen, click on Upload in the top right, select your Employee.csv file from your computer and then click on the Upload button on the bottom right

Uploading our csv file
Once our file has uploaded, we can head to the Data Intelligence Modeler. Create a new Pipeline (Graph), then add and connect the following three Operators in sequence: Structured File Consumer->Table Producer->Graph Terminator

Place the operators in our Pipeline
The Structured File Consumer will take our csv file from the DI_DATA_LAKE and read it in a form that can be processed. The Table Producer will then take this data and use it to UPSERT records into the table we just created. After this has completed, the Graph Terminator will end the processing of our Pipeline
Let's get our operators set up. First, select the Structured File Consumer, then edit the Source Object
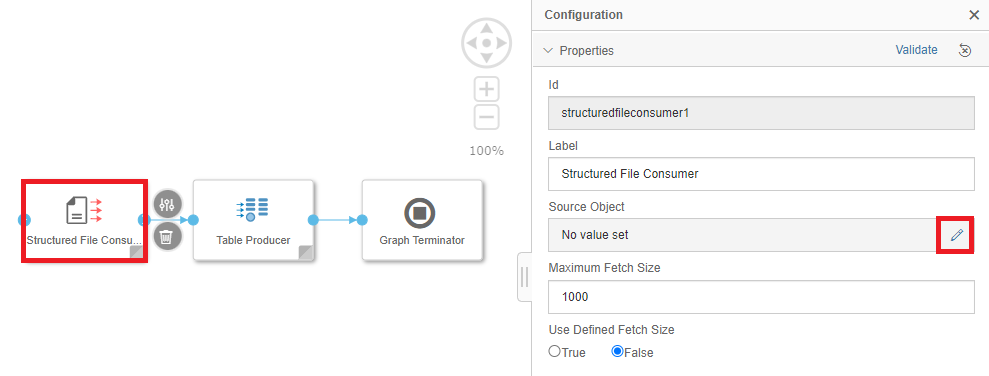
Edit the Source Object of our Structured File Consumer
Select the SDL (Semantic Data Lake) Service, Connection ID (DI_DATA_LAKE) and the Source (File Path to our Employee.csv file) then click back
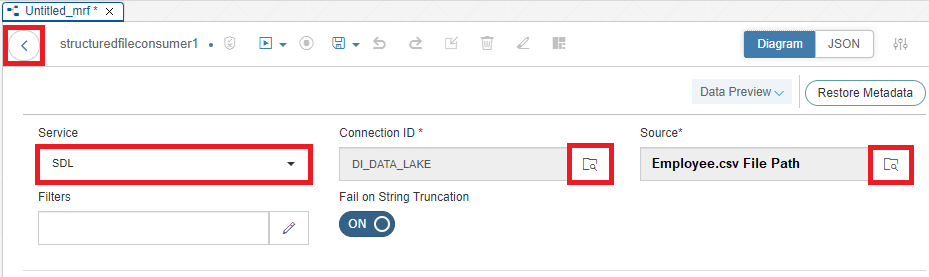
Set Source Object
Next, we're going to set up our Table Producer Operator
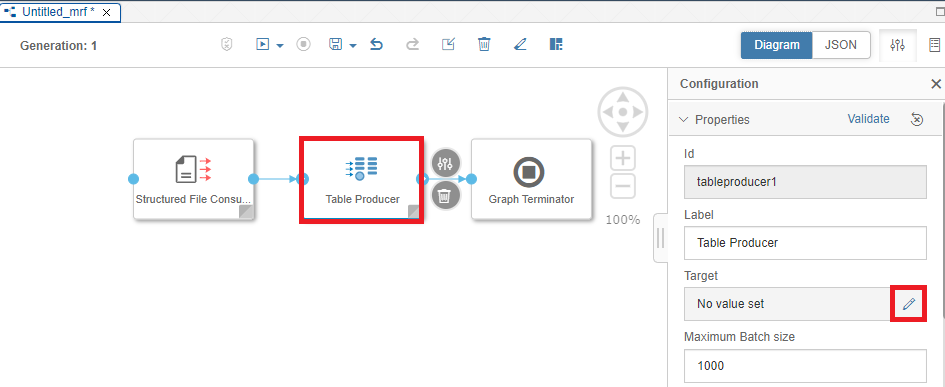
Edit the Target for the Table Producer Operator
Set the Source to HANA_DB if it isn't already set. Select our Connection ID (DWC_UPSERT), then click on the Target Box
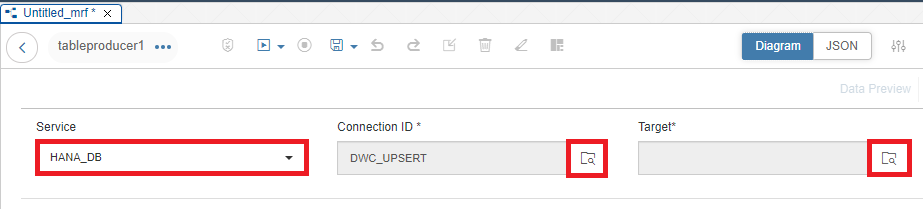
Set up the Target
Select the Open SQL Schema that was created in Data Warehouse Cloud when creating the Database User (in this example, UPSERTDEMO#DIUSER)
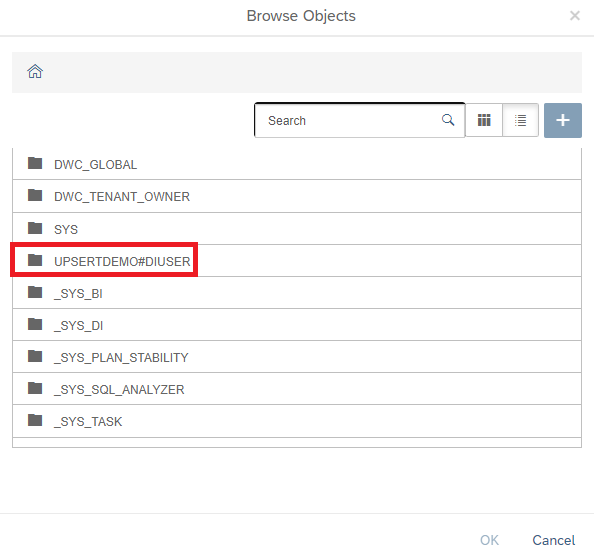
Select the Database User Schema
Select our Employee table, then click OK. Select the Upsert checkbox, and map our three table columns to C0, C1 & C2 in our Target Columns. Select the back arrow
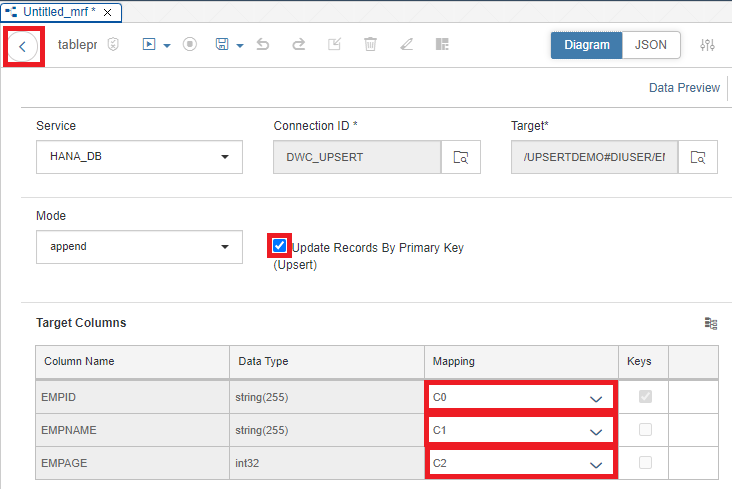
Select Upsert, then map our three columns
Save our new pipeline. Before we run our Pipeline, we'll need to employ a quick workaround. When creating our Database User in DWC, the Schema is created with the hashtag character (#). However, in Data Intelligence the Table Consumer doesn't allow the hashtag character in its targets.
As noted by my colleague he-rima in his blog post, we can get around this issue. Switch from the Diagram view along the top right to the JSON view. Find the qualified name property, and replace "%23" with our hashtag (#)

Replace with a hashtag (#)
Switch back to the Diagram view, then Save and Run the Pipeline
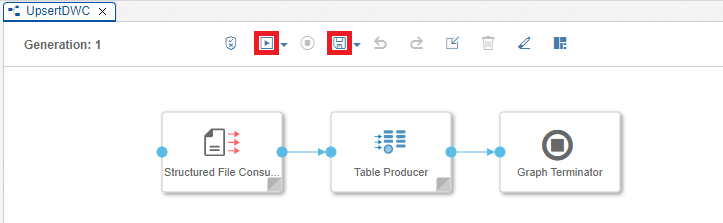
Running our Pipeline
Success
Once our Pipeline Run has been successfully completed, we'll see it at the bottom of the Modeler

Pipeline Run has been completed successfully
We can also verify the contents using the Data Intelligence Metadata Explorer
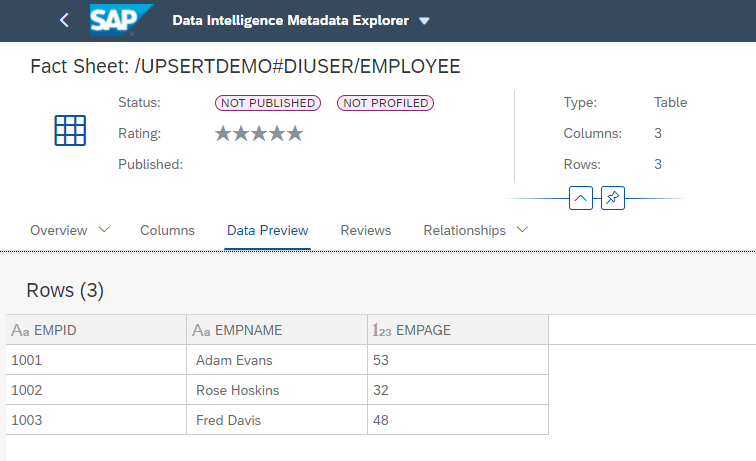
Our data has been successfully added to the table within our Data Warehouse Cloud Space
Conclusion
Now that we've got our initial data loaded into the table, how can we continue to use our Pipeline to upsert changes to the table? All we'll need to do is use our Metadata Explorer to replace the existing Employee.csv that we've pointed our Structured File Consumer to. Then, we can simply Run our pipeline and the contents of the file will be automatically upserted
At smaller data volumes, this setup may feel like overkill. However, as the data volumes within the csv expand and change frequently, this Data Intelligence pipeline will help you scalably manage changes
In this blog post we've learned how we can create a Data Intelligence Pipeline to upsert data into a table within a Data Warehouse Cloud Space. I hope this blog post has been helpful, and thank you for reading
Note: While I am an employee of SAP, any views/thoughts are my own, and do not necessarily reflect those of my employer
 Bluesky


