
- SAP Community
- Products and Technology
- Enterprise Resource Planning
- ERP Blogs by SAP
- Scheduled data upload into SAP Signavio Process In...
Enterprise Resource Planning Blogs by SAP
Get insights and updates about cloud ERP and RISE with SAP, SAP S/4HANA and SAP S/4HANA Cloud, and more enterprise management capabilities with SAP blog posts.
Turn on suggestions
Auto-suggest helps you quickly narrow down your search results by suggesting possible matches as you type.
Showing results for
Employee
Options
- Subscribe to RSS Feed
- Mark as New
- Mark as Read
- Bookmark
- Subscribe
- Printer Friendly Page
- Report Inappropriate Content
03-03-2023
12:51 PM
Introduction
In this blog I would like to show you how you can easily upload from any source system into SAP Signavio Process Intelligence using SAP Cloud Integration.
SAP Cloud Integration offers a wide range of connectors to on-premise and cloud SAP as well as non-SAP solutions and this data we can leverage in SAP Signavio Process Intelligence to start our process mining journey and can detailled insights into our processes.
In my scenario I setup a scheduler that retrieves the data from an SAP S/4HANA Cloud API in a specific interval. If you like to use another API or connectivity option that is available in SAP Cloud Integration, go for it, the scenario will also work.
Activate API in S/4HANA Cloud
Lets log on to our S/4HANA Cloud system and activate the API.
In this scenario I am leveraging the Commercial Project Read API.
We go to the app "maintain communication user" to create a new technical user that handles the basic authentication for the API

Create communication user
Then we create a communication system in the app "maintain communication system" and assign our communication user to it. Here you can maintain any host name, as we are only interested in reading data from S/4HANA Cloud.

Create communication system
Now we activate the respective API. For that we go the app "maintain communication arrangement" and create the arrangement SAP_COM_0054. Once we saved the arrangement our API is ready to be used. We can also see the URL of our API.

Create communication arrangement
Activate API in Signavio Process Intelligence
We logon to Signavio and on the top right corner we access the product Process Intelligence.

Access Process Intelligence
Once we access Process Intelligence we can click on the top right corner on "Manage Data".

Manage Data
Then we see our process data pipelines. On the left side click on "Connections".

Connections
Here we create a new connection.

Create new connection
Under "Other" we select Ingestion API and give the connection a name.
Once we save the connection, we get the URL endpoint and a token to call the API.
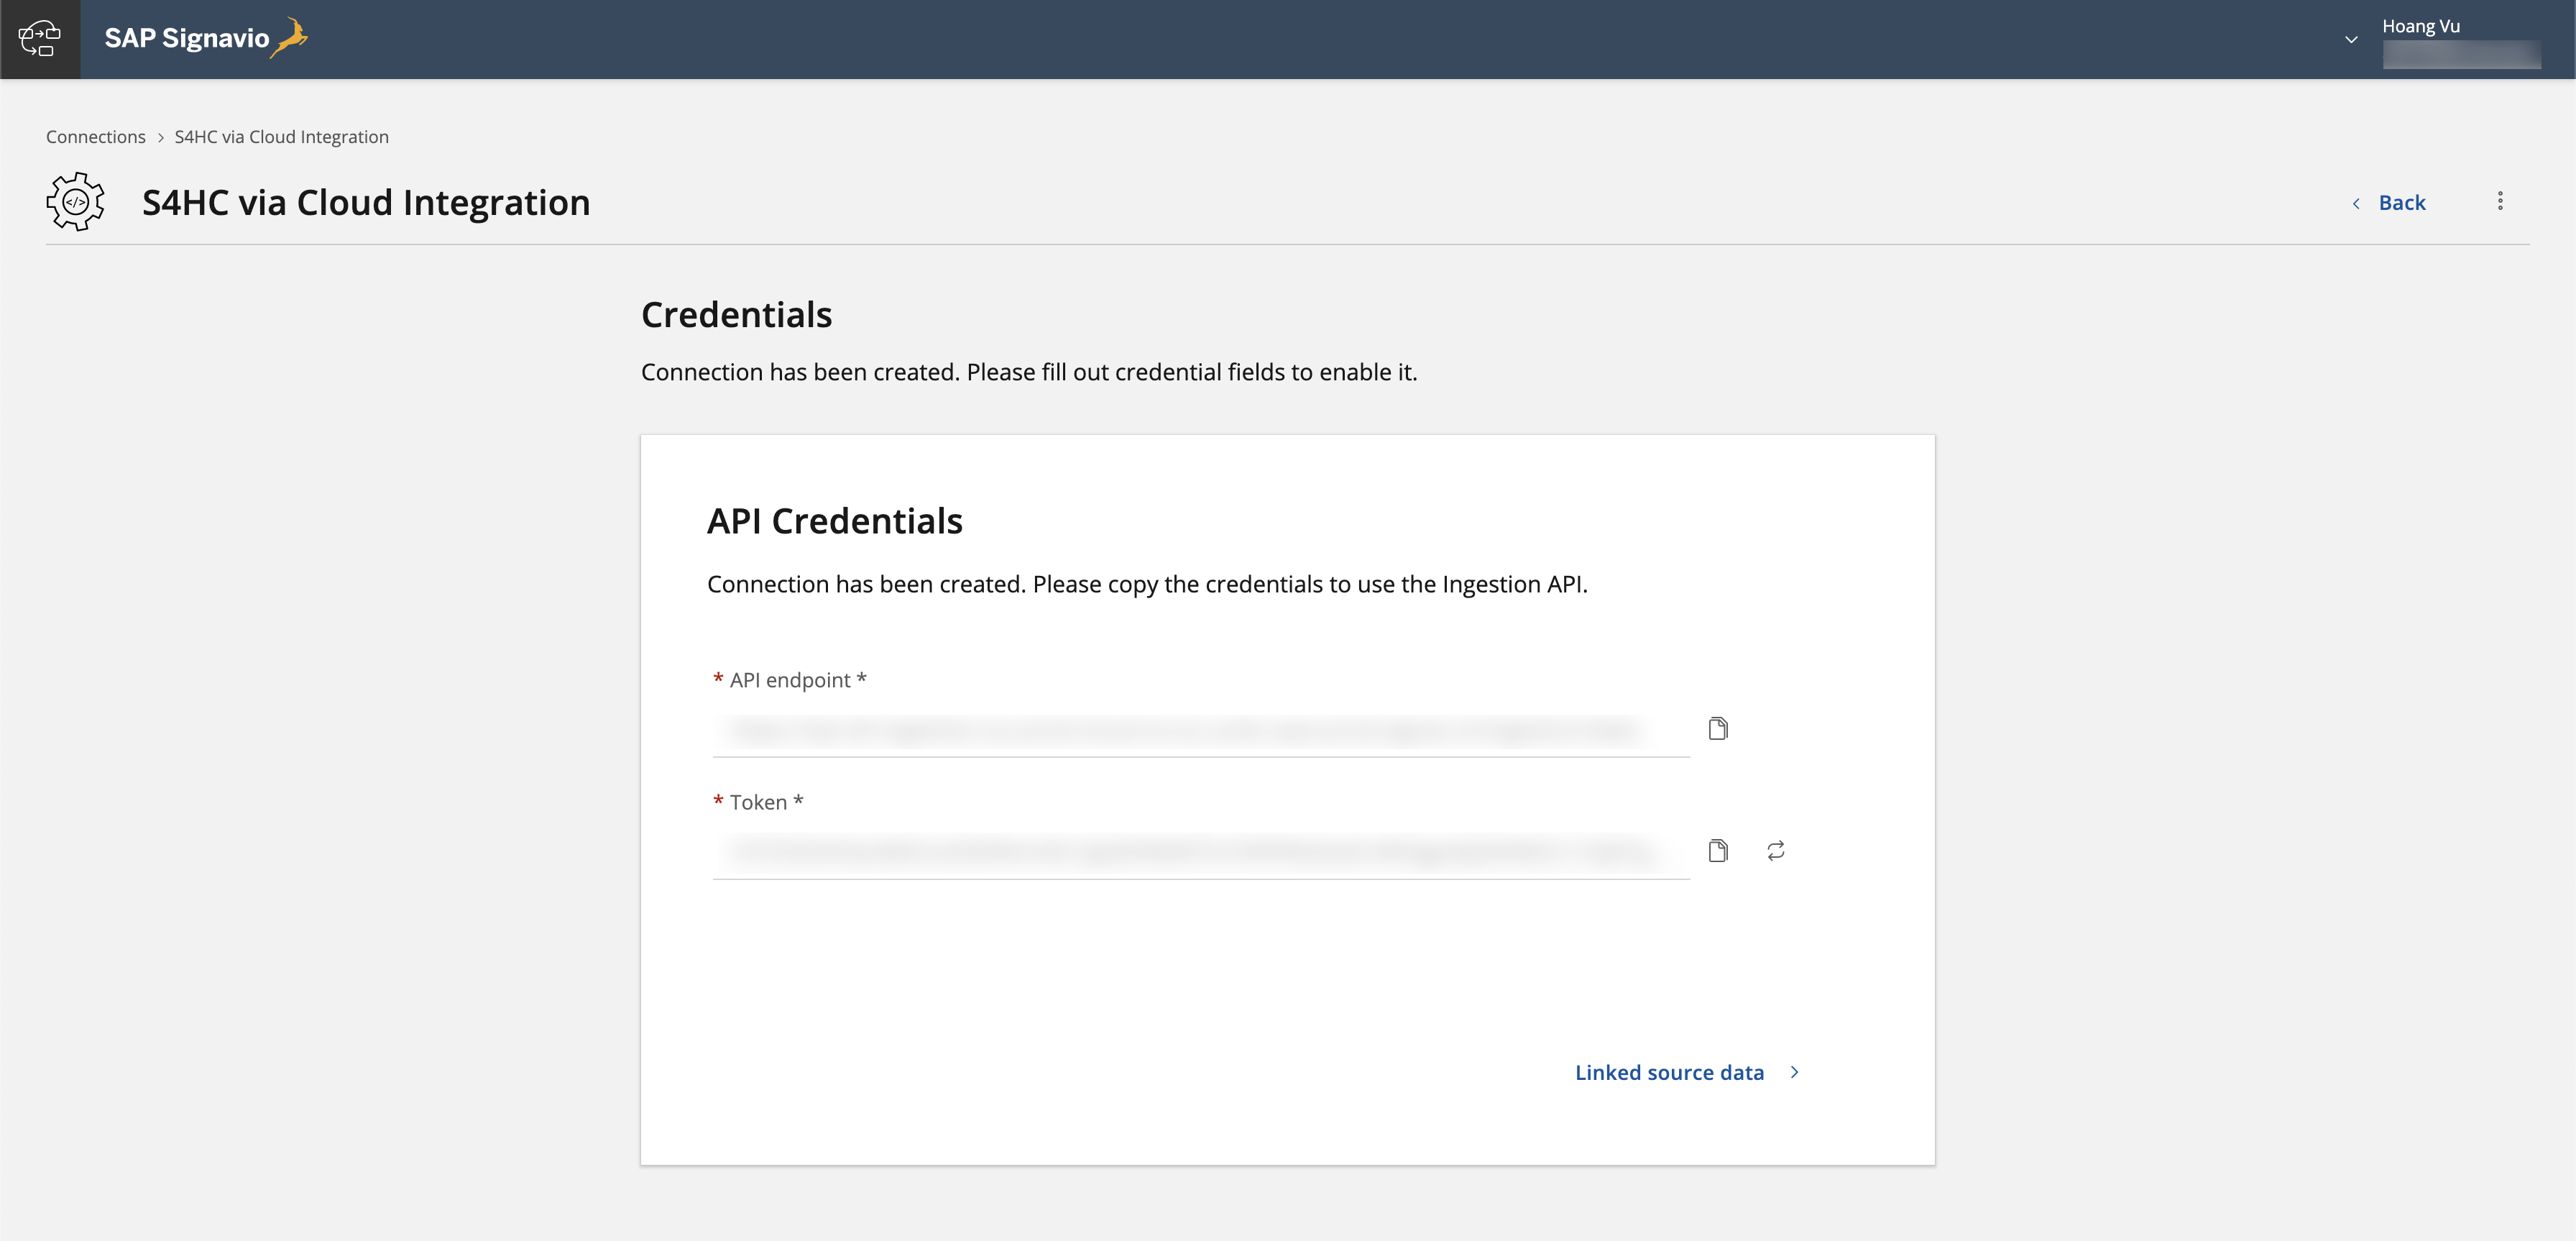
Endpoint and token
Configure Integration Flow
All APIs that we want to use are ready.
Now we log on to Cloud Integration and create an integration flow that looks like this:

Complete integration flow
Lets go through each element here.
The integration flow starts with a timer event, that we schedule to run every hour between a specific time interval.

Timer event
In the next step we add a Request Reply as we are calling a synchronous OData API.
In the OData channel we insert the URL we received from the communication arrangement and the credential name from the communication user in S/4HANA Cloud. Note that the credential name needs to be maintained in the monitoring tab under "Security Materials".

Endpoint and technical user
In the processing tab of the OData channel, we also select the fields we want to retrieve from the API.
In my scenario I selected following fields for demo purposes.

Select fields in OData API
Now that we have retrieved the data in XML format, we convert it to CSV as this is the format that the ingestion API expects. For the we use the module XML to CSV converter.
We select the field separator to be comma and include the field names as headers.

XML to CSV convertor
In the next step I created a content modifier and set the message header "Accept" to "application/json".

Message header Accept
I also set the properties required by the API
Primary key: I use the mandatory field ProjectID
Schema:
Here we insert the schema of our extracted data.
As we are using it in our exchange property, it has to be in one row without spaces.
{"type":"record","name":"Projects","fields":[{"name":"ProfitCenter","type":["null","string"]},{"name":"CostCenter","type":["null","string"]},{"name":"ProjectName","type":["null","string"]},{"name":"Customer","type":["null","string"]},{"name":"ProjectID","type":["null","string"]},{"name":"ProjManagerId","type":["null","string"]}]}
Content type: multipart/form-data; boundary=cpi
The boundary separates the different values in the payload later.
Token: "Bearer <token from Process Intelligence>"
Here we insert the token we received from activating the ingestion API in Process Intelligence.

Message properties
In the next step I created an additional content modifier and insert the property content type and token into the header. The reason why I did not do it directly is that I encountered some issues when the message header had a blank space in between, which mine did. If anyone knows a nicer way to handle this, please let me know!

Add properties to header
Now I added a groovy script to overcome the line ending issues mentioned in this blog.
My groovy script looks like this:
import com.sap.gateway.ip.core.customdev.util.Message;

import java.util.HashMap;

def Message processData(Message message) {

    //Body

       map = message.getProperties();

	   schema = map.get("schema");

	   primarykeys = map.get("primarykeys");

    //Body

       def body = message.getBody(String);

       body = body.replaceAll("\n", "\r\n");

       body = """--cpi\r\nContent-Disposition: form-data; name="schema"\r\n\r\n\r\n""" + schema + """\r\n--cpi\r\n""" + """Content-Disposition: form-data; name="files"; filename="S4.csv"\r\nContent-Type: text/csv\r\n\r\n\r\n""" + body +"""--cpi\r\nContent-Disposition: form-data; name="primaryKeys"\r\n\r\n""" + primarykeys + """\r\n--cpi--"""


       message.setBody(body);

       return message;

}
In the final step we need to configure a http channel to the ingestion API in Process Intelligence.
As we already provided the authorization directly in the message header with the content modifier, we select no authorization here and just insert the endpoint URL.

Call ingestion API
Results
Once you run the integration flow successfully, you can logon the Process Intelligence where you setup the ingestion API and click on "Linked source data". There you can see all the fields that have been replicated from Cloud Integration to Process Intelligence
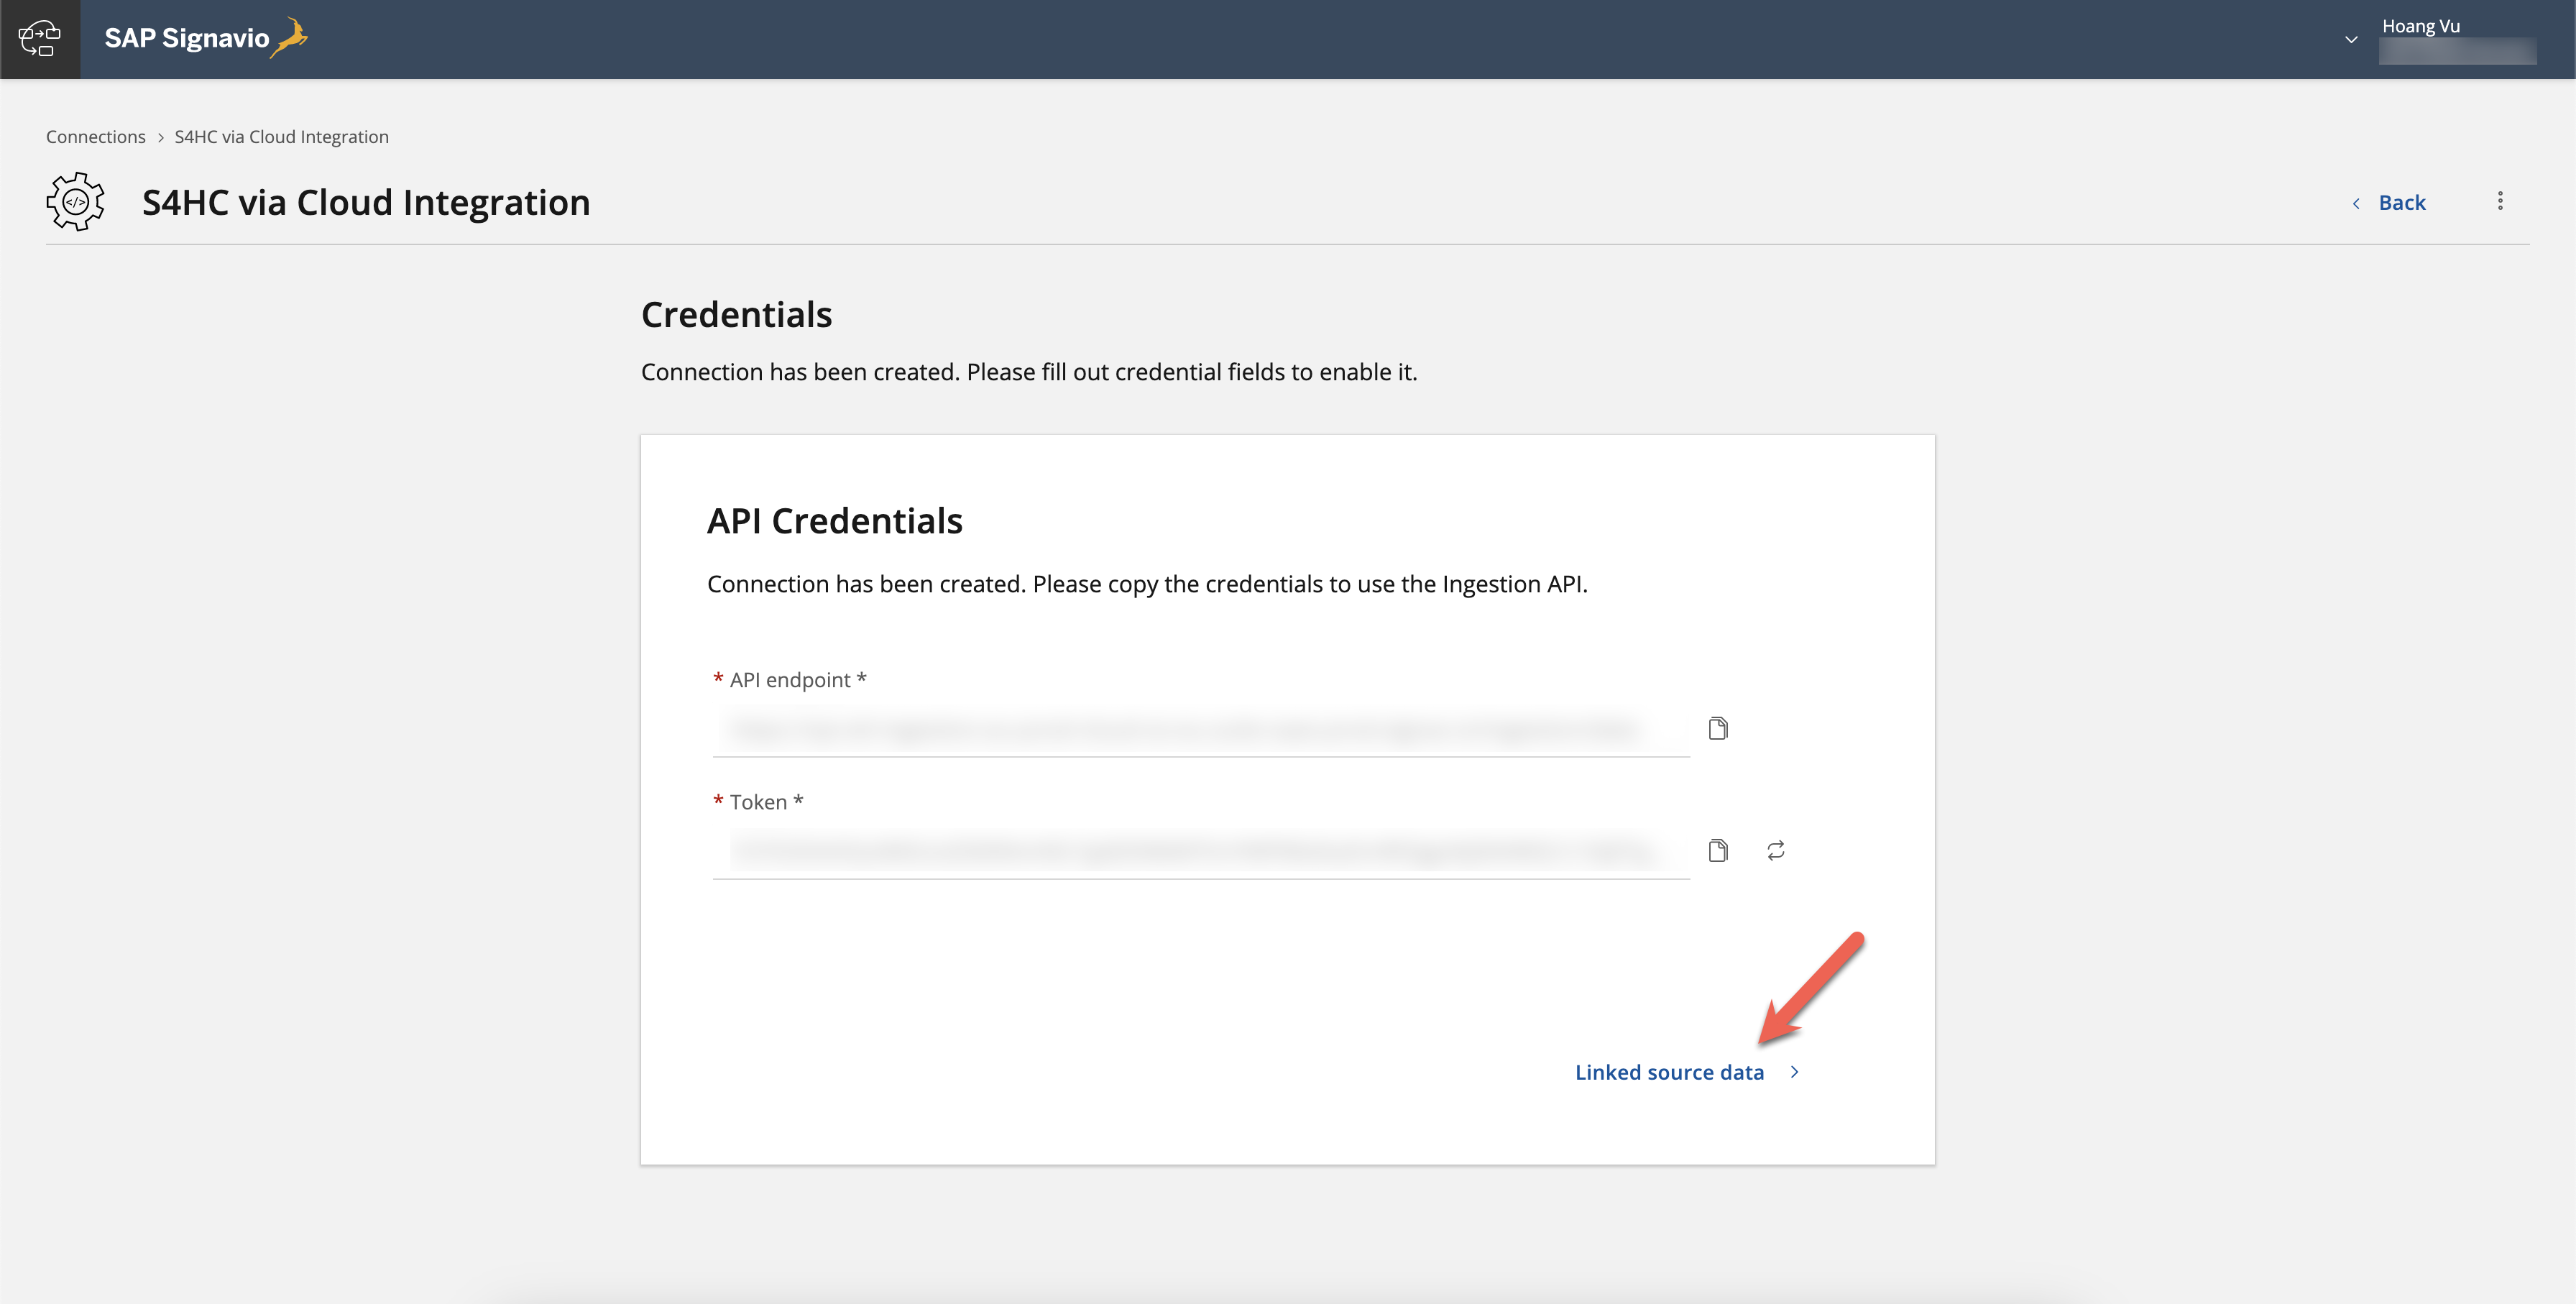
Linked source data
You can also see that we set ProjectID as our primary key with this indicator:

Data fields and primary key
Conclusion
And that sums up the configuration steps to setup your first simple scenario to upload data into Signavio Process Intelligence using Cloud Integration.
However, this is only the start! We will invest more in bringing Cloud Integration and Signavio Process Intelligence together for API-based integration scenarios.
If you have any specific requirement to upload data into Signavio Process Intelligence where you are evaluating different connectivity options, feel free to reach out to me 🙂
Labels:
1 Comment
You must be a registered user to add a comment. If you've already registered, sign in. Otherwise, register and sign in.
Labels in this area
-
Artificial Intelligence (AI)
1 -
Business Trends
363 -
Business Trends
29 -
Customer COE Basics and Fundamentals
1 -
Digital Transformation with Cloud ERP (DT)
1 -
Event Information
461 -
Event Information
27 -
Expert Insights
114 -
Expert Insights
181 -
General
1 -
Governance and Organization
1 -
Introduction
1 -
Life at SAP
415 -
Life at SAP
2 -
Product Updates
4,682 -
Product Updates
261 -
Roadmap and Strategy
1 -
Technology Updates
1,500 -
Technology Updates
97
Related Content
- SAP Activate Realize and Deploy phase activities in the context of Scaled Agile Framework in Enterprise Resource Planning Blogs by SAP
- SAP Enterprise Project Connection 3.0 - End of Mainstream Support in Enterprise Resource Planning Blogs by SAP
- Ways to create a purchase order in SAP in Enterprise Resource Planning Blogs by Members
- SAP Activate methodology Prepare and Explore phases in the context of SAFe. in Enterprise Resource Planning Blogs by SAP
- Innovate Faster: The Power Duo of SAP Activate and Scaled Agile Framework (SAFe) in Enterprise Resource Planning Blogs by SAP
Top kudoed authors
| User | Count |
|---|---|
| 10 | |
| 6 | |
| 5 | |
| 4 | |
| 4 | |
| 3 | |
| 3 | |
| 3 | |
| 3 | |
| 2 |