Introduction
SAP Cloud Platform Open Connectors is a recent addition to the Integration and Orchestration suite of services that simplifies and accelerates the connectivity to third-party cloud applications. It provides prebuilt connectors to an extensible library of over 170 of the most popular non-SAP cloud applications. If you are unfamiliar with the offering, I would suggest that you check the documentation
here.
Now let’s think of a use case where you have used Open Connectors and created an instance to establish connectivity to any one of the 3
rd Party applications like HubSpot CRM. Often, you would want to manage this instance that you have just created, for example by adding a quota limit to it. This is exactly what API Management will help you do. This blog will tell you how you can discover your Open connector instances in API Portal and then create API Proxies for these instances which you can later strengthen using the rich policy set available to you.
Pre-requisite
You need to create an instance for HubSpot CRM in Open Connectors following
this blog.
Keep the Organization secret, User secret from the Open Connectors service page handy.

Create an API Provider
In the API Portal, you have an option in the Configure page to create API providers that help you establish connectivity to a backend system. In this case, the Open Connectors service is our backend system. We create an API Provider with the type ‘Open Connectors’. Choose the region where your Open connectors service in running. Enter the Organization secret and User secret that you retrieved from the cockpit. Save the API Provider.

Create an API Proxy
Switch to the Develop page in the API Portal. Start creating an API Proxy. In the create dialog, select the API Provider you just created and click on Discover and wait for the magic ?

This will display all the Open Connector instances you have created, and you should see your HubSpot CRM instance as well.

Select the instance. This will automatically pull all the details from the instance including Name, Title, description, Base path (which you can optionally modify). Remove any spaces in the Name.

On confirming the create dialog, you will be navigated to the API Proxy that got created. Explore the various tabs; observe the target endpoint and resources. They are automatically taken over from the Open connector instance that you chose.


Save the API Proxy.

Navigate to the Policy editor to see that there is a new Policy called ‘Open Connectors’ that is attached to the postflow of the target endpoint. This is responsible for passing on the authorization header to the Open Connector instance for successful connectivity.
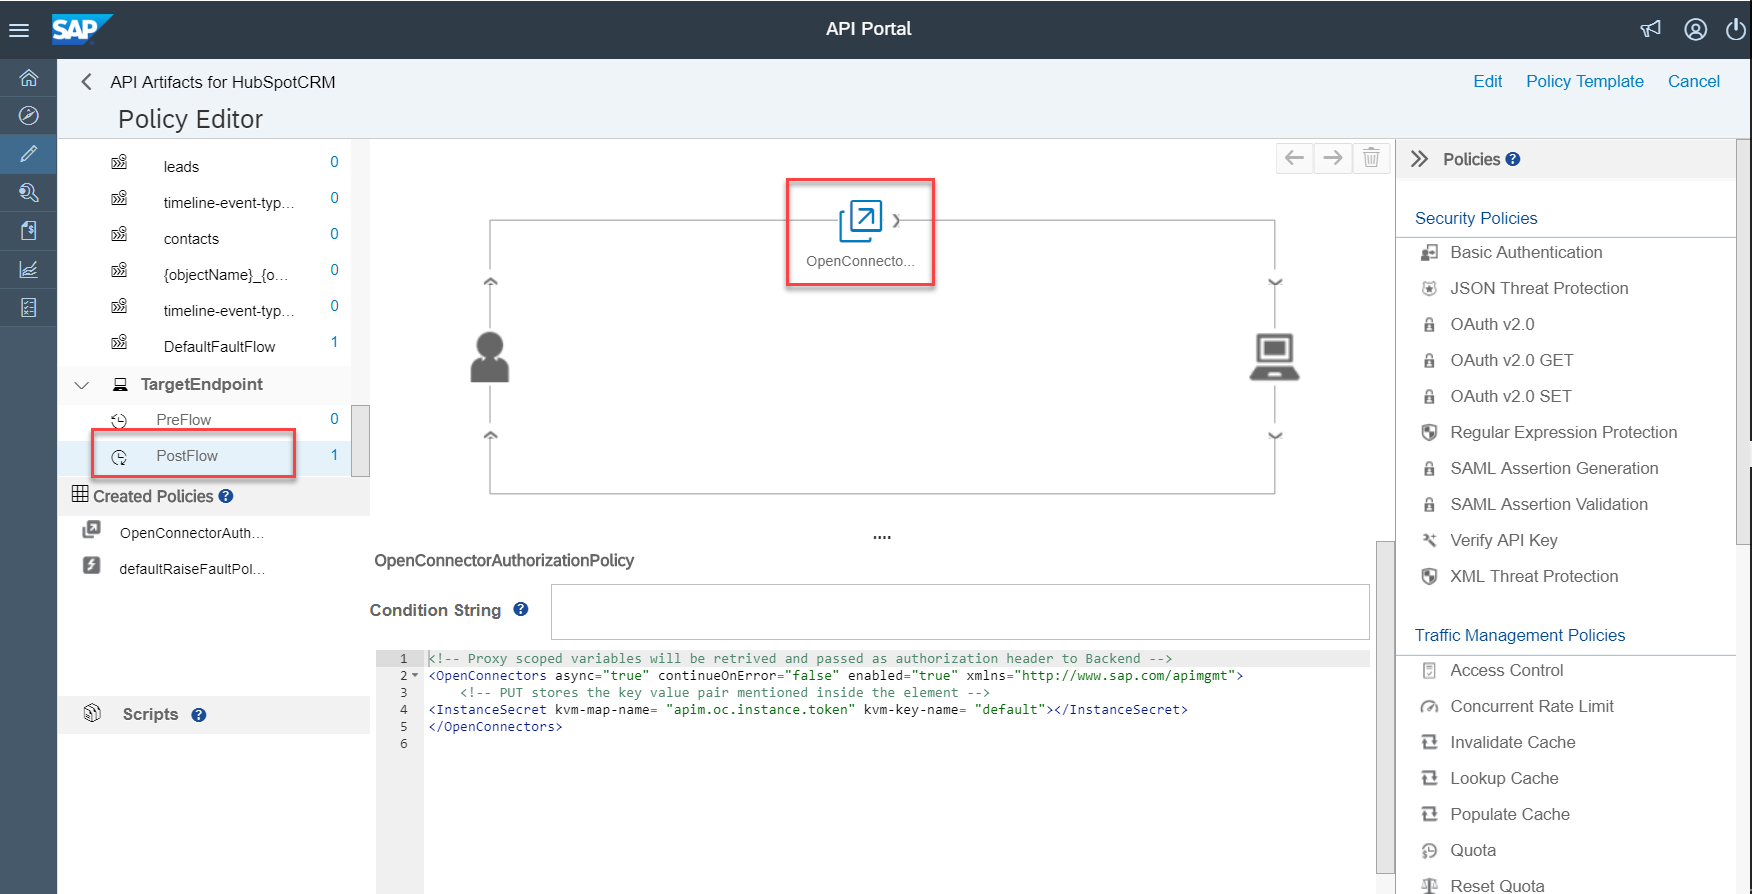
Under the Key Value Map section of the API Proxy you will see a new entry. That holds the instance token securely.

You don’t have to modify anything at this point in time, just
deploy the API Proxy.

Now, copy the API Proxy URL to a browser window and append it with any of the resource paths – say /contacts. You should see the result from the HubSpot CRM API!!

Summary
In the above steps, we saw how we could create an API Provider in API Portal to generically connect to an Open Connector service and then create API Proxies corresponding to the various connector instances. Once the API Proxy is created, you can add the rest of the policies of your choice. All this, without leaving your API Portal. This was easy, isn’t it?
