- SAP Community
- Products and Technology
- Technology
- Technology Q&A
- Configuring SAP CI/CD pipeline for Deploying React...
- Subscribe to RSS Feed
- Mark Question as New
- Mark Question as Read
- Bookmark
- Subscribe
- Printer Friendly Page
- Report Inappropriate Content
Configuring SAP CI/CD pipeline for Deploying ReactJS application in Cloud Foundry
- Subscribe to RSS Feed
- Mark Question as New
- Mark Question as Read
- Bookmark
- Subscribe
- Printer Friendly Page
- Report Inappropriate Content
a week ago
In this blog, we will discuss how to integrate SAP CI/CD pipeline for deploying ReactJS application on SAP Cloud Foundry environment.
You will learn,
- How to create and build a ReactJS application.
- How to configure and run SAP CI/CD Pipeline service.
- How to create GitHub Webhook for automatically build, test and deploying the code changes.
Prerequisites
- You have an SAP BTP Global or trial account.
- Node installed in your system.
- You have a GitHub account.
Setting up React Application
step 1: Create your react application using the create-react-app. The create-react-app is an excellent tool which allows you to create and run React project very quickly by wrapping all the required dependencies.
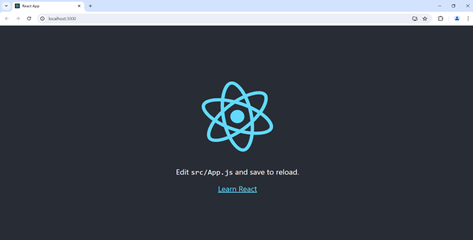
npx create-react-app reactcicdstep 2: To ensure that the application is running as expected, open the terminal and navigate to the application folder and type the below command. The application gets automatically hosted in the default server localhost:3000 and you’ll get the following screen.
npm startstep 3: Now create manifest.yml file for determining the Cloud Foundry app configurations and paste the below contents.
 ---
applications:
- name: your-app-name
path: build/
instances: 1
buildpack: https://github.com/cloudfoundry/staticfile-buildpack.git
memory: 256M
step 4: Build the application using the below command, you will see the build folder getting added to your project.
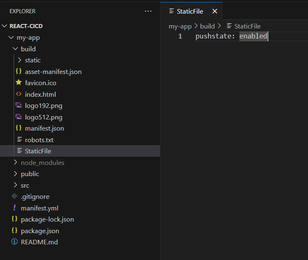
npm run buildAlso create a Staticfile with the following content in the build folder as shown below
step 5: Now create a repository in your GitHub and push the changes. Make sure to remove build folder from the gitignore file since it is added default while creating the react project, we require it for deployment. For more details on how to deploy react application refer this link react-CF-deploy
Enable SAP Continuous integration and Delivery Service
step 1: Login into SAP BTP Cockpit and choose the subaccount to which you want to deploy your application.
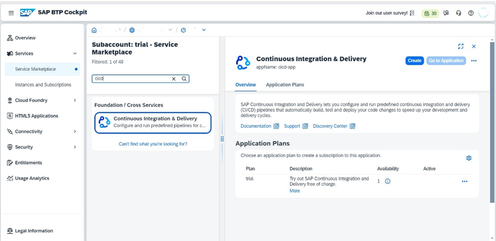
step 2: Select Service Marketplace from the side pane and search for Continuous Integration and Delivery service. Click the create button
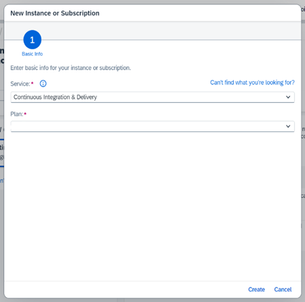
step 3: Create popup will appear then choose the plan you want to and click create button at the bottom. Choose View Subscription and wait until the status changes to Subscribed.
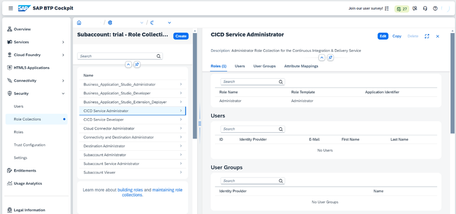
step 4: Once the status is changed to subscribed navigate to Security → Role Collections from the left-hand pane. Choose role collection CICD Service Administrator and click edit.
step 5: Navigate to users section click edit then Add a new row in the Users section table, enter your user id, Keep the identity provider as default and click save.
Configure your credentials
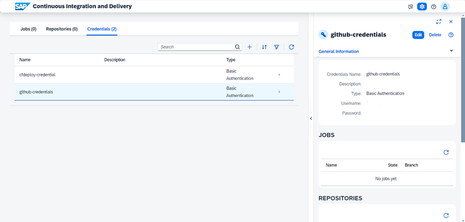
step 1: Go to Services → Instances and Subscriptions from the pane. Choose the application icon located next to the Continuous Integration & Delivery subscription. Now we need to add credentials for GitHub, CF and Webhook.
step 2: Let’s first go with GitHub credentials. If your GitHub repository is private, you will need to provide with the necessary credentials to access it. You can skip this in case of public repository.
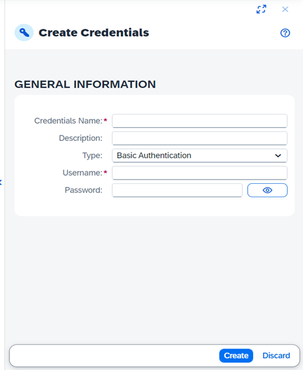
step 3: In Create Credentials popup make sure you give unique name within the subaccount. Select the type as basic authentication and provide your git credentials. Use personal access token as a password. Then choose create.
step 4: Now repeat the same steps for adding CF credentials. Here you have to provide your SAP BTP cockpit username and password.
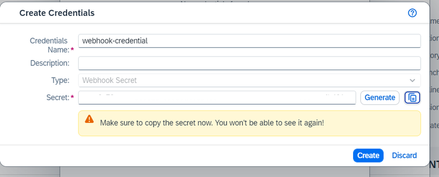
step 5: For configuring webhook credentials change the type from Basic Authentication to Webhook Secret. Then generate the webhook secret copy it somewhere safe and finally choose Create.
Add a CI/CD job
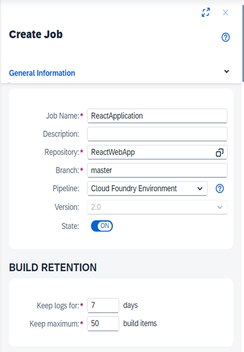
step 1: Navigate to the Jobs tab and choose the icon to add a new job. Provide unique name for the job.
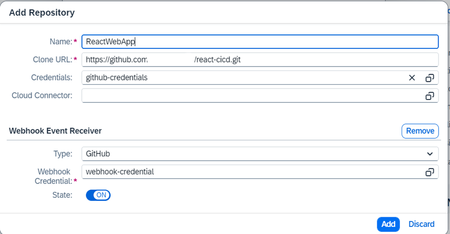
step 2: Click on the icon inside the Repository input field. You will get a popup then choose add repository., Enter your git repository clone URL. You can add any name of your choice. It need not to be matched with your repo. Choose your saved credentials for git and webhook.
step 3: For Branch, enter the GitHub branch of your repository from which you want to receive push events. In this example, master. Select Cloud Foundry Environment from the dropdown in the Pipeline field.
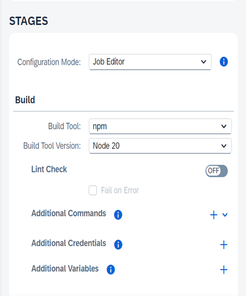
step 4: In the BUILD section choose npm as your build tool. For Build Tool Version, select the latest node version.
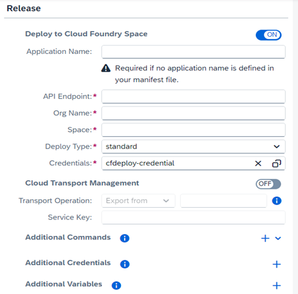
step 5: Under the Release section, switch on the execution of the Deploy to Cloud Foundry Space. Since we have already given name in the manifest file, we can skip the name field.
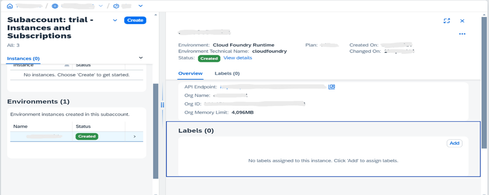
Replace the placeholders API Endpoint, Org Name and Space with the values in the Cloud Foundry environment to which you want to deploy. You can get the values from your subaccount overview in the SAP BTP cockpit.
step 6: For Deploy Type, choose standard and select your previously created CF credentials. Leave remaining fields default then finally choose create.
Create a GitHub Webhook
GitHub webhooks allow you to automate CI/CD builds. Whenever you push changes to your GitHub repository, a webhook push event is sent to the service to trigger a build of the connected job.
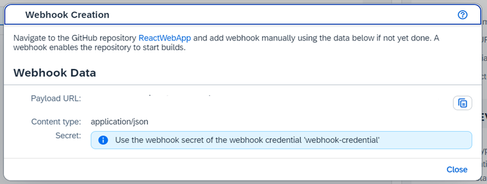
step 1: To create a webhook in GitHub, you need payload URL. Select your repository and choose Webhook Data from the right pane. You will see a below popup:
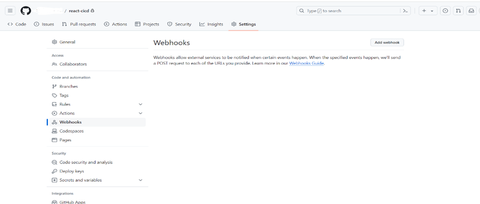
step 2: Now sign in into your GitHub account. In your project, go to the Settings tab.
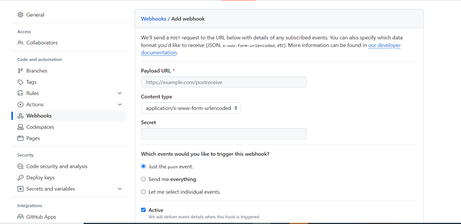
step 3: From the left pane, choose Webhooks then Add webhook. Enter the Payload URL, Content type from the popup and the Secret that you had saved previously. For all other settings, leave the default values and add.
Verify your Build
You have to trigger your job manually the first time after creation.
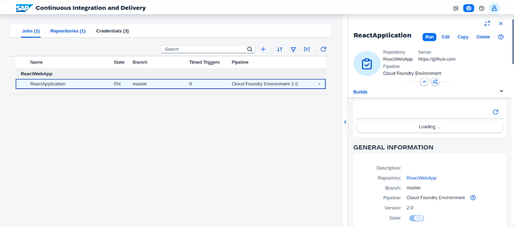
step 1: In Jobs tab, select your job and choose Run. Verify that a new tile appears in the Builds view. This tile should be marked as running.
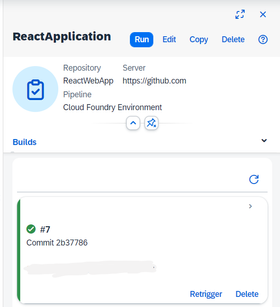
step 2: Wait until the job has finished and verify that the build tile is marked as successful.
step 3: Navigate to your space in the SAP BTP cockpit and check the list of installed applications. Now you can see your application got added.
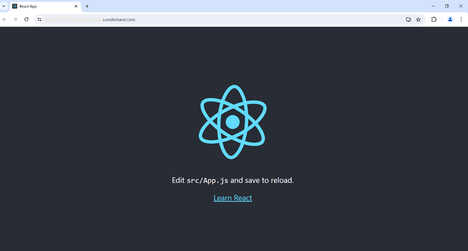
step 4: Select your application and launch it with the application route. You can see the react application deployed.
You have now successfully created a CI/CD pipeline and deployed your Reactjs application to SAP BTP. From now on for every commit you can see the job getting triggered with commit id displayed under builds section.
Accepted Solutions (0)
Answers (0)
- revamped SAP First Guidance Collection in Technology Blogs by Members
- SAP BAS (Can I Deploy multiple times UI5 Application into ABAP Repository using BAS Trail Version) in Technology Q&A
- New Card Upload Process and Role-based Filtering of Cards in Work Zone Adv in Technology Blogs by SAP
- Principle propagation for non SAP sender in PI 7.50 AEX in Technology Q&A
- Build Full Stack Applications in SAP BTP Cloud Foundry as Multi Target Applications (MTA) in Technology Blogs by Members
| User | Count |
|---|---|
| 76 | |
| 9 | |
| 8 | |
| 7 | |
| 6 | |
| 5 | |
| 5 | |
| 5 | |
| 5 | |
| 5 |


You must be a registered user to add a comment. If you've already registered, sign in. Otherwise, register and sign in.