
- SAP Community
- Products and Technology
- Technology
- Technology Blogs by SAP
- Mass upload and update capability in Requirement M...
Technology Blogs by SAP
Learn how to extend and personalize SAP applications. Follow the SAP technology blog for insights into SAP BTP, ABAP, SAP Analytics Cloud, SAP HANA, and more.
Turn on suggestions
Auto-suggest helps you quickly narrow down your search results by suggesting possible matches as you type.
Showing results for
Advisor
Options
- Subscribe to RSS Feed
- Mark as New
- Mark as Read
- Bookmark
- Subscribe
- Printer Friendly Page
- Report Inappropriate Content
02-03-2022
6:22 PM
Updated on: 01.06.22
We at SAP Cloud ALM continue to innovate and roll out features that help you in faster implementation of your projects. Defining requirements correctly is critical to Project success. It is easy to upload the requirements in bulk and also mass update them in one go. And the cherry on the top is that we let you upload and update all task types such as Requirements, Template tasks, Project tasks, User stories, Subtasks and Defects together!
Let me explain,how you can easily mass upload and mass update your Requirements into SAP Cloud ALM. I will cover the following points:
This feature will help you to upload multiple requirements in one go. Using this feature, you can download requirements from one project or a third-party system and upload them into another project. The supported transaction types include requirement, project tasks, user stories, and sub-tasks which can be uploaded individually or even as a hierarchy. Let me explain to you briefly the steps to upload the tasks:
You need to first download a template with a specific format. Go to the Requirement UI in SAP Cloud ALM. In the Items list, click on the download icon and select "template". After choosing the option, the Microsoft Excel file will be downloaded to your local desktop.
Let us understand the template structure in detail:
After you download the template, you can edit it based on your requirement. You can update the existing items or create new items by following these tips:
Do not change the title of the items having source SAP Cloud ALM Setup, SAP Activate Methodology, SAP Central Business Configuration".If you change the title of the existing item, the system will not be able to recognize it and the items will not be updated.
All the task types have system generated unique IDs. It ensures that you are updating the right tasks. You can see the Unique IDs in the application by either enabling the field in the list view through settings or download as spreadsheet to view them. You can copy and enter the ID in your excel file.
Type the text in the respective sections as mentioned in the corresponding sheet.
Only fill for the type Requirement and leave the column blank for other items.
Select the timebox from available text. You cannot upload custom timebox items via upload. However, the custom timebox items that were added in the Timebox section of the Project UI before downloading the template are available in the texts.
You can select the deliverables from the available texts. You can also add, assign and upload a custom deliverable to the Microsoft Excel sheet.
Select the workstream as mentioned in the workstreams sheet.
You can add the assigned roles from the available text. You cannot add custom assigned roles via upload. If you create the custom role in the Project UI before downloading the template, they are available and can be assigned to the items. You can also leave the section empty and add the role later in the tool.
You can add the details about the item here.
An External ID is a custom field that has the external ID attribute, meaning that it contains unique record identifiers from a system outside of SAP Cloud ALM.
Please note that for the purpose of mass updating the manually created tasks, the system matches the title and goes to track the external ID field:
Specify the row number of the parent item in the column "Parent Row".
You can add References as shown below:
You can add available tags and also create, assign and upload custom tags.
Here comes the surprise! You can also add following columns that are not yet available in the template but are already supported by the system.
You can add a new column "Predecessor Row" to define the predecessor- successor relationship between the items. Specify the row number of the predecessor item in the newly made column.
You can also add a new column, "comments" to add comments and upload them into SAP Cloud ALM.
You can also add a new column, "assignee" and add the assignee to the item.
Please add the email address of the assignee in this column. If you write the name, the item shows that assignee is a former member!
Check the final prepared data that is now ready to be uploaded in the system!
Click the upload icon, select the prepared file and select Upload. A dialog appears that gives the details how many tasks will be created/ updated.
Note: If the external id was not given during item creation, the existing items cannot be updated and the system will create new item with same name!
You can view the project tasks, user stories and sub-tasks in the requirements tile! Adapt the filter and select Type filter.
Click the dropdown menu and select the type of items that you want to vie in the Items section:
You can now view the items in the Items section.
Mass upload and mass update are extremely powerful tools that will save you hours compared to manual updates. Leveraging these automated tools also reduces the risk for human error when used carefully, though it is highly recommended to run small tests before triggering large updates to ensure that your changes appear as expected before proceeding.
Hope you found this information useful. We are constantly innovating to give you a seamless implementation experience. For latest updates and notifications you can follow me by clicking bhagwati.purohit.
Please visit the Expert Portal for more information on SAP Cloud ALM for implementation. You can read more blog posts for project and task management here!
Please feel free to reach out to us if you are looking for more information. We would love to hear from you!
We at SAP Cloud ALM continue to innovate and roll out features that help you in faster implementation of your projects. Defining requirements correctly is critical to Project success. It is easy to upload the requirements in bulk and also mass update them in one go. And the cherry on the top is that we let you upload and update all task types such as Requirements, Template tasks, Project tasks, User stories, Subtasks and Defects together!
Let me explain,how you can easily mass upload and mass update your Requirements into SAP Cloud ALM. I will cover the following points:
- Overview
- Download Template
- Template Structure
- Preparing the data
- Upload into the system
Overview:
This feature will help you to upload multiple requirements in one go. Using this feature, you can download requirements from one project or a third-party system and upload them into another project. The supported transaction types include requirement, project tasks, user stories, and sub-tasks which can be uploaded individually or even as a hierarchy. Let me explain to you briefly the steps to upload the tasks:
Download Template:
You need to first download a template with a specific format. Go to the Requirement UI in SAP Cloud ALM. In the Items list, click on the download icon and select "template". After choosing the option, the Microsoft Excel file will be downloaded to your local desktop.

Download the template
Template Structure:
Let us understand the template structure in detail:

Template Structure
- You will find 9 worksheets that correspond to the item attributes. Please see the image above with sheets highlighted in red.
- The "Tasks" is the main sheet where you will provide data. The first row is the header row. Please see the image above with sheets highlighted in green.
- You can add a new column to the template known as "Predecessor Row" to define the relationship of Predecessor and Successor.
- Other sheets (Types, Sources, etc..) have the available texts that can be used for editing the individual task attributes.
- Please make sure that except title and description all other fields have predefined values which you see in the other sheets as explained in point 3.
- The description field supports HTML tags to get proper formatting.
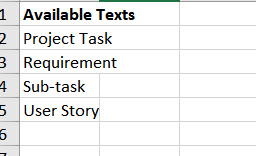
Available text for the Type column
Preparing the data into the template:
After you download the template, you can edit it based on your requirement. You can update the existing items or create new items by following these tips:
Title:
Do not change the title of the items having source SAP Cloud ALM Setup, SAP Activate Methodology, SAP Central Business Configuration".If you change the title of the existing item, the system will not be able to recognize it and the items will not be updated.
ID:
All the task types have system generated unique IDs. It ensures that you are updating the right tasks. You can see the Unique IDs in the application by either enabling the field in the list view through settings or download as spreadsheet to view them. You can copy and enter the ID in your excel file.

Enable ID column in the application

ID column in the template
Types, Sources and Status:
Type the text in the respective sections as mentioned in the corresponding sheet.
Requirement Status:
Only fill for the type Requirement and leave the column blank for other items.
Timebox:
Select the timebox from available text. You cannot upload custom timebox items via upload. However, the custom timebox items that were added in the Timebox section of the Project UI before downloading the template are available in the texts.

Customize Timebox
Deliverables:
You can select the deliverables from the available texts. You can also add, assign and upload a custom deliverable to the Microsoft Excel sheet.
Workstreams:
Select the workstream as mentioned in the workstreams sheet.
Assigned Roles:
You can add the assigned roles from the available text. You cannot add custom assigned roles via upload. If you create the custom role in the Project UI before downloading the template, they are available and can be assigned to the items. You can also leave the section empty and add the role later in the tool.

Create Custom Role
Description:
You can add the details about the item here.
External ID:
An External ID is a custom field that has the external ID attribute, meaning that it contains unique record identifiers from a system outside of SAP Cloud ALM.
Please note that for the purpose of mass updating the manually created tasks, the system matches the title and goes to track the external ID field:
- If a task with the same external ID is found from the system, it will be updated
- If no task is found by this external ID, a new task will be created with such external ID

External ID
Parent Row:
Specify the row number of the parent item in the column "Parent Row".
References:
You can add References as shown below:

References
Tags:
You can add available tags and also create, assign and upload custom tags.
Adding New columns:
Here comes the surprise! You can also add following columns that are not yet available in the template but are already supported by the system.
Predecessor Row:
You can add a new column "Predecessor Row" to define the predecessor- successor relationship between the items. Specify the row number of the predecessor item in the newly made column.
Comments:
You can also add a new column, "comments" to add comments and upload them into SAP Cloud ALM.
Assignee:
You can also add a new column, "assignee" and add the assignee to the item.
Please add the email address of the assignee in this column. If you write the name, the item shows that assignee is a former member!
Check the final prepared data that is now ready to be uploaded in the system!

Data prepared for the upload
Upload into SAP Cloud ALM:
Click the upload icon, select the prepared file and select Upload. A dialog appears that gives the details how many tasks will be created/ updated.

Note: If the external id was not given during item creation, the existing items cannot be updated and the system will create new item with same name!
How to see Project tasks, user stories and sub-tasks created by upload in Requirement tile:
You can view the project tasks, user stories and sub-tasks in the requirements tile! Adapt the filter and select Type filter.

Adapt Filter Type
Click the dropdown menu and select the type of items that you want to vie in the Items section:

You can now view the items in the Items section.
Benefits:
Mass upload and mass update are extremely powerful tools that will save you hours compared to manual updates. Leveraging these automated tools also reduces the risk for human error when used carefully, though it is highly recommended to run small tests before triggering large updates to ensure that your changes appear as expected before proceeding.
Next steps:
Hope you found this information useful. We are constantly innovating to give you a seamless implementation experience. For latest updates and notifications you can follow me by clicking bhagwati.purohit.
Please visit the Expert Portal for more information on SAP Cloud ALM for implementation. You can read more blog posts for project and task management here!
Please feel free to reach out to us if you are looking for more information. We would love to hear from you!
- SAP Managed Tags:
- RISE with SAP,
- SAP Activate,
- SAP Cloud ALM
Labels:
7 Comments
You must be a registered user to add a comment. If you've already registered, sign in. Otherwise, register and sign in.
Labels in this area
-
ABAP CDS Views - CDC (Change Data Capture)
2 -
AI
1 -
Analyze Workload Data
1 -
BTP
1 -
Business and IT Integration
2 -
Business application stu
1 -
Business Technology Platform
1 -
Business Trends
1,658 -
Business Trends
113 -
CAP
1 -
cf
1 -
Cloud Foundry
1 -
Confluent
1 -
Customer COE Basics and Fundamentals
1 -
Customer COE Latest and Greatest
3 -
Customer Data Browser app
1 -
Data Analysis Tool
1 -
data migration
1 -
data transfer
1 -
Datasphere
2 -
Event Information
1,400 -
Event Information
76 -
Expert
1 -
Expert Insights
177 -
Expert Insights
348 -
General
1 -
Google cloud
1 -
Google Next'24
1 -
GraphQL
1 -
Kafka
1 -
Life at SAP
780 -
Life at SAP
14 -
Migrate your Data App
1 -
MTA
1 -
Network Performance Analysis
1 -
NodeJS
1 -
PDF
1 -
POC
1 -
Product Updates
4,575 -
Product Updates
392 -
Replication Flow
1 -
REST API
1 -
RisewithSAP
1 -
SAP BTP
1 -
SAP BTP Cloud Foundry
1 -
SAP Cloud ALM
1 -
SAP Cloud Application Programming Model
1 -
SAP Datasphere
2 -
SAP S4HANA Cloud
1 -
SAP S4HANA Migration Cockpit
1 -
Technology Updates
6,871 -
Technology Updates
486 -
Workload Fluctuations
1
Related Content
- RingFencing & DeCoupling S/4HANA with Enterprise Blockchain and SAP BTP - Ultimate Cyber Security 🚀 in Technology Blogs by Members
- SAP Datasphere - Space Management in Technology Blogs by Members
- First steps to work with SAP Cloud ALM Deployment scenario for SAP ABAP systems (7.40 or higher) in Technology Blogs by SAP
- SAP Cloud ALM: Requirements Management on Steroids in Technology Blogs by SAP
- SAP BTP FAQs - Part 1 (General Topics in SAP BTP) in Technology Blogs by SAP
Top kudoed authors
| User | Count |
|---|---|
| 14 | |
| 11 | |
| 10 | |
| 10 | |
| 10 | |
| 9 | |
| 8 | |
| 7 | |
| 7 | |
| 6 |